> ## Documentation Index
> Fetch the complete documentation index at: https://siliconflow-4a6a0801.mintlify.site/llms.txt
> Use this file to discover all available pages before exploring further.
# MindBricks
## 1. About MindBricks
MindBricks is an intelligent novel editor available for both macOS and Windows platforms. You can download and install it on your computer to enjoy a brand-new writing experience powered by MindBricks!
This guide will walk you through how to use SiliconCloud's API services for novel creation within MindBricks.
***
## 2. Installing MindBricks
Visit the [official MindBricks website](https://mindbricks.cn) and download the appropriate version for your operating system.
***
## 3. Using SiliconCloud in MindBricks
### 3.1 Default Configuration
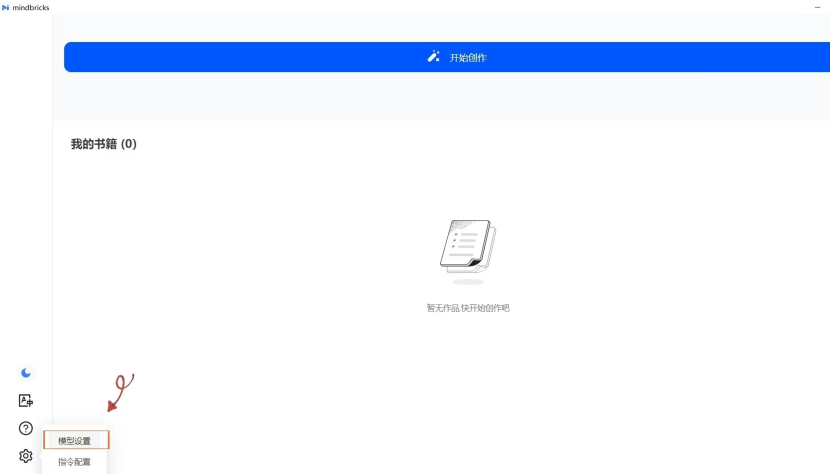
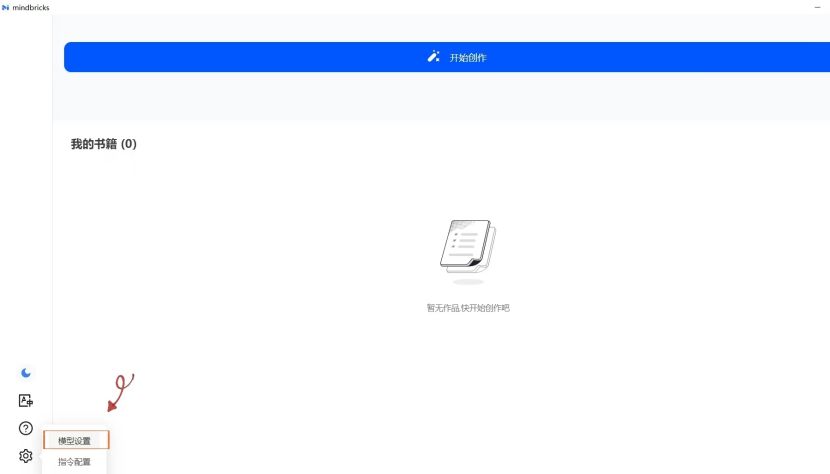
After installing MindBricks, click the **\[gear icon]** in the bottom right corner and select **\[Model Settings]**.
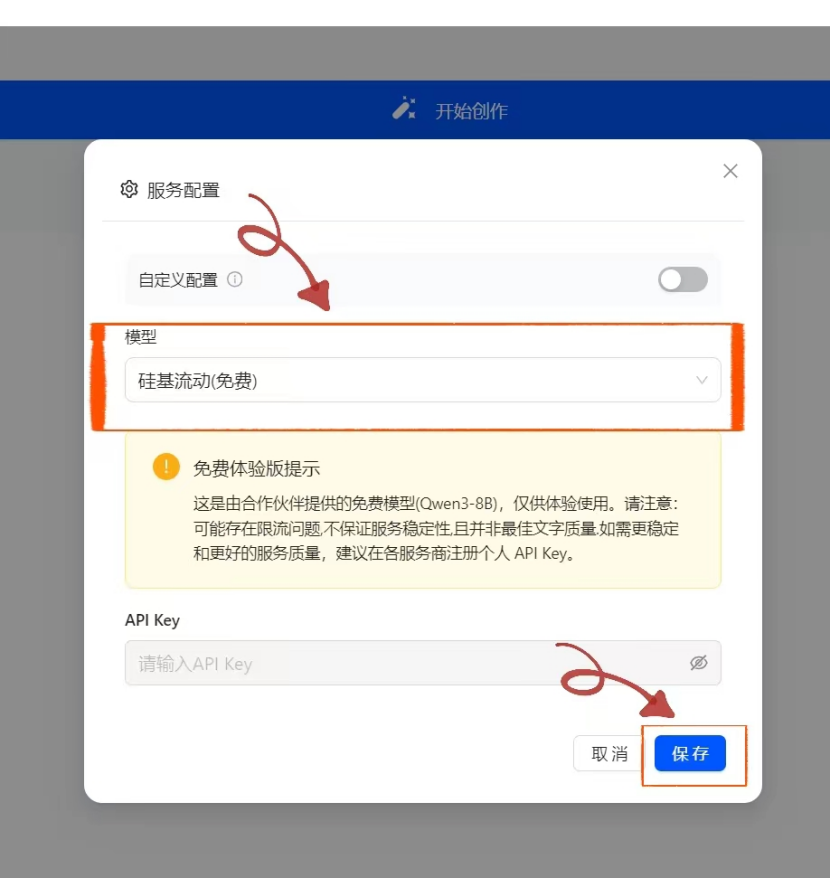
 In the **\[Model]** dropdown, choose **"SiliconCloud (Free)"** and click **Save**.
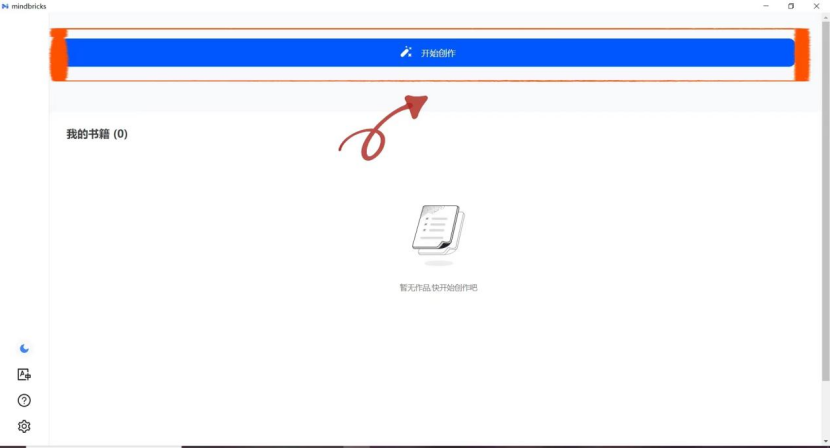
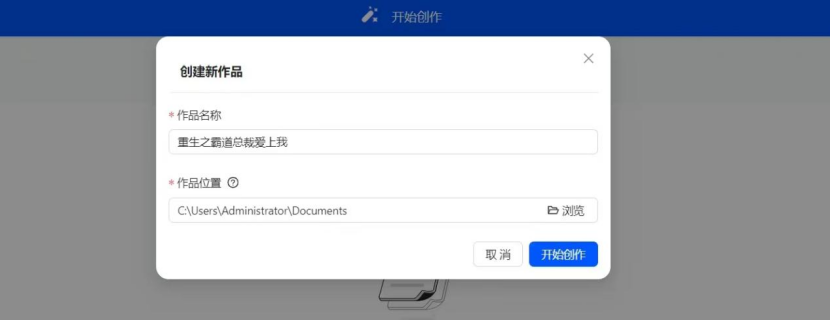
 On the main screen, click **\[Start Creating]**, then enter your project name and choose the file location to create a new novel.
 **Note:** The free model provided by default is `Qwen3-8B`. To use other models from SiliconCloud, you need to obtain a SiliconCloud API Key.
***
### 3.2 Using Other Text Generation Models from SiliconCloud
Go to the [SiliconCloud official website](https://cloud.siliconflow.cn/) and register for an account (or log in if you already have one).
After registering, visit the [API Key page](https://cloud.siliconflow.cn/account/ak) and create a new API key. Click the key to copy it for later use.
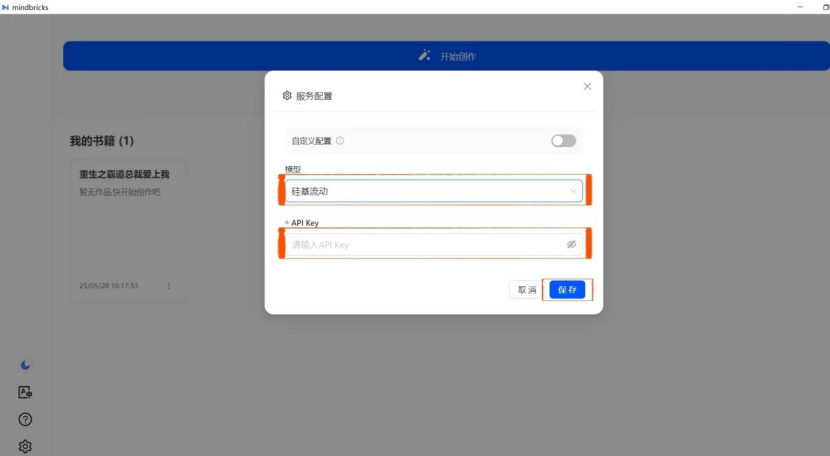
Return to the **\[Model Settings]** page in MindBricks. Select **\[SiliconCloud]** under the **\[Model]** dropdown, paste your API Key into the corresponding field, and click **Save** to start using the service.
**Note:** The free model provided by default is `Qwen3-8B`. To use other models from SiliconCloud, you need to obtain a SiliconCloud API Key.
***
### 3.2 Using Other Text Generation Models from SiliconCloud
Go to the [SiliconCloud official website](https://cloud.siliconflow.cn/) and register for an account (or log in if you already have one).
After registering, visit the [API Key page](https://cloud.siliconflow.cn/account/ak) and create a new API key. Click the key to copy it for later use.
Return to the **\[Model Settings]** page in MindBricks. Select **\[SiliconCloud]** under the **\[Model]** dropdown, paste your API Key into the corresponding field, and click **Save** to start using the service.
 ***
**Note:** MindBricks comes pre-configured with different models optimized for various use cases, including:
* **Dialogue Models**: Default is `Qwen/Qwen3-235B-A22B` from SiliconCloud
* **Character Models**: Default is `Qwen/Qwen3-235B-A22B` from SiliconCloud
* **Inference Models**: Default is `deepseek-ai/DeepSeek-R1` from SiliconCloud
If you want full control over model selection, you can configure a custom model setup.
***
**Note:** MindBricks comes pre-configured with different models optimized for various use cases, including:
* **Dialogue Models**: Default is `Qwen/Qwen3-235B-A22B` from SiliconCloud
* **Character Models**: Default is `Qwen/Qwen3-235B-A22B` from SiliconCloud
* **Inference Models**: Default is `deepseek-ai/DeepSeek-R1` from SiliconCloud
If you want full control over model selection, you can configure a custom model setup.